the final step in building capeMirror is to ensure that it can receive instructions from astronomical software programmes like SkyMap, Cartes du Ciel etc. To do this I used a software platform called the ASCOM standard.
![]()
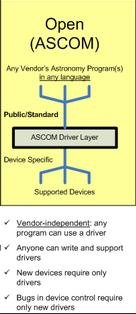 The Astronomy Common Object Model (ASCOM) is intended to permit easy communication between different astronomy programmes and astronomical devices (primarily telescopes). So, rather than building a telescope and then having to write separate software for each astronomical programme that’s on the market , the ASCOM standard allows a telescope maker to meet the requirements of ASCOM thus ensuring it can then be used by every astro software – assuming that the software allows use of the standard (which they all do). For a better intro,
So, to get astronomical software programmes to ‘talk’ to capeMirror I need to write a driver that uses the ASCOM standard. The driver is the exact equivalent of a printer driver that comes with a new printer. Each piece of hardware (here a binocular mirror mount) has its own software to allow other programmes to operate it (for a printer – word, for capeMirror – skymap pro etc).
This is my short account of downloading the platform and starting to work with the driver templates.
1. download the ascom platform
Select all components for installation. (Every computer wanting to communicate with capeMirror will need to have this platform downloaded.)
a. Read the support document: “Before using the templates!” (C:\Program Files\Common Files\ASCOM\Doc\Templates.html)
b. Install the templates – as per the document at 2: Locate the file C:\Program Files\Common Files\ASCOM\.net\ASCOMDriverTemplates.vsi andd double-click it. I just installed the ASCOM telescope driver template – rather than the focuser etc. (If the PC doesn’t recognise the .vsi extension then download Visual Basic 2008 Express first – see below.)
2. create a telescope driver template
I wrote the ASCOM driver for capeMirror in visual basic 2008 express because it’s free. You can download it from the link below. I was also greatly assisted by all those on the ASCOM user group forum – especially Bob Denny, Tim Long, and Chris Rowload who were particularly helpful.
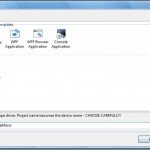
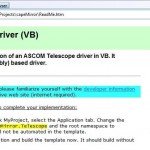
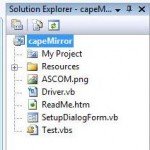
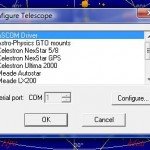
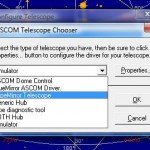
a. So first up, open Visual Basic 2008 Express (RUN AS ADMINISTRATOR if in Vista) and click on ‘Create Project’, then under My Templates select ASCOM telescope driver. You should get windows like those below on the way (click thumbnail to view).
b. Follow the instructions which pop-up (see middle picture above) – they are also in the ReadMe.htm document in the new project if needed again. There are a couple of points to note though:
• re point 1 of the instructions: it appears now to have be done automatically even though it says it won’t have been.
• re point 2: when I first “built” the project I got this error: “Error 1 Cannot register assembly – access denied. Please make sure you’re running the application as administrator. Access to the registry key is denied.” After a google it turns out that you have to run vb express as an administrator (right-click the vb express icon and select ‘run as administrator’).
• re point 3: The express version of visual basic 2008 does not allow step 3 (double-clicking the test.vbs script). The error is: “A project with output type class library cannot be started directly.” After a bit of hunting around I came up with the following workaround: VB Express 2008 creates a vbproj.user file that you can’t see within VB Express itself. But you can “Open With” Notepad. So open it with NotePad and add the following three tags to the ‘debug’ properties :
<PropertyGroup Condition=" '$(Configuration)|$(Platform)'== 'Debug|AnyCPU' ">
<StartAction>Program</StartAction>
<StartProgram>C:\WINDOWS\SYSTEM32\wscript.exe</StartProgram>
<StartArguments>test.vbs</StartArguments>
</PropertyGroup>
In other words, you add in three characteristics “StartAction”, “Start Program”, and “Start Arguments”. The ‘start program’ has to point to wscript.exe (wherever that is in your system files). The final file should look like this:
<Project xmlns="http://schemas.microsoft.com/developer/msbuild/2003">
  <PropertyGroup>
    <PublishUrlHistory>
    </PublishUrlHistory>
    <InstallUrlHistory>
    </InstallUrlHistory>
    <SupportUrlHistory>
    </SupportUrlHistory>
    <UpdateUrlHistory>
    </UpdateUrlHistory>
    <BootstrapperUrlHistory>
    </BootstrapperUrlHistory>
    <ErrorReportUrlHistory>
    </ErrorReportUrlHistory>
    <FallbackCulture>en-US</FallbackCulture>
    <VerifyUploadedFiles>false</VerifyUploadedFiles>
  </PropertyGroup>
<PropertyGroup Condition=" '$(Configuration)|$(Platform)'== 'Debug|AnyCPU' ">
<StartAction>Program</StartAction>
<StartProgram>C:\WINDOWS\SYSTEM32\wscript.exe</StartProgram>
<StartArguments>test.vbs</StartArguments>
</PropertyGroup>
  </Project>
You then have to move the test.vbs file into the bin\debug folder of your project. Now, reopen the project. Press f5. the new driver should now appear in the list of available telescopes.
• Cut and paste astro32.dll into C/Windows. This dll is needed to run the astronomy calculations. I’m afraid that I can’t currently locate it online so I’ve included a copy here.
3. check template within the astro software
I use SkyMap Pro which needs it’s own ASCOM interface download. Having downloaded and installed that, then in the list of telescopes appears: “ASCOM Driver”. Select that driver, click ‘Configure’, and the new driver should be there – here ‘Cape Mirror’.
Now it’s time to code the driver.
Ben
Acknowledgements
I need to acknowledge and give grateful thanks to two people who really helped me with this part of the project through their input on the ASCOM user group forum. I simply could not have done any of this without the patient assistance of many but in particular: Bob Denny and Tim Long. Bob even took time out to call me from wherever he is in the USA to help me with the install of the ASCOM templates. Not even his dog barking in the background was going to distract him!



post a comment...
you must be logged in to post a comment.